HTML Template
Overview
sh
├── src/
│   ├── nodes/ # Your nodes
│   │   ├── my-node-1/
│   │   │   ├── editor/ # Your node editor folder
│   │   │   │   └── index.{html,pug} # Your node editor HTML/Pug (mandatory)
└── package.json
You can use HTML or Pug to create your editor template.
⚠️
The Pug file is prioritized over the HTML file.
Example
html
<div class="dxp-template-form-row">
    <label for="node-input-name">
        <i class="fa fa-tag"></i>
        Name
    </label>
    <div class="content">
        <input type="text" id="node-input-name"/>
    </div>
</div>
<div class="dxp-template-form-row">
    <label for="node-input-entry">
        <i class="fa fa-ellipsis-h"></i>
        Property
    </label>
    <div class="content">
        <input type="text" id="node-input-entry">
        <input type="hidden" id="node-input-entryType">
    </div>
</div>
Available Classes
Some classes are available to help you to create a beautiful template.
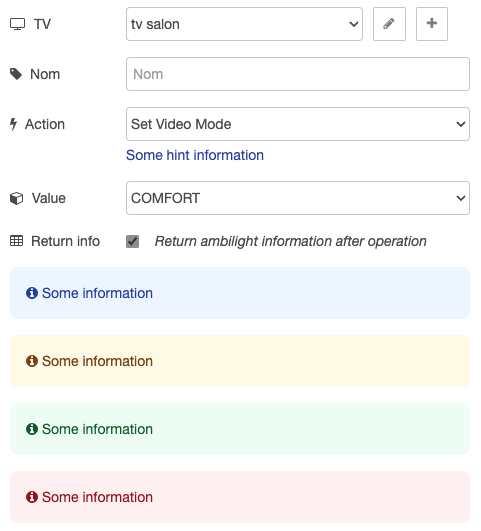
.dxp-template-form-row
Help you to create a row in the form. But something more beautiful.
Raw HTML
html
<div class="dxp-template-form-row">
    <label for="node-input-name">
        <i class="fa fa-tag"></i>
        Name
    </label>
    <div class="content">
        <input type="text" id="node-input-name"/>
    </div>
</div>
<div class="dxp-template-form-row">
    <label for="node-input-entry">
        <i class="fa fa-ellipsis-h"></i>
        Property
    </label>
    <div class="content">
        <input type="text" id="node-input-entry">
        <input type="hidden" id="node-input-entryType">
    </div>
</div>
<div class="dxp-template-form-row">
    <label for="node-input-category">
        <i class="fa fa-list-alt"></i>
        Category
    </label>
    <div class="content">
        <select id="node-input-category"></select>
        <div class="hint hint-info italic">Some hint</div>
    </div>
</div>
<div class="dxp-template-form-row extra-field inverseReturnValue">
    <label for="node-input-inverseReturnValue">
        <i class="fa fa-arrow-circle-o-right"></i>
        Inverse
    </label>
    <div class="content">
        <div class="checkbox">
            <input type="checkbox" id="node-input-inverseReturnValue">
            <span>Inverse the return value (<span class="italic">not</span> of condition)</span>
        </div>
    </div>
</div>
<div class="alert alert-info fn-docs extra-field text-center"></div>
Hints
You have access to the following classes to style the hint:
.hint.hint-info.hint-warning.hint-danger.hint-success
.alert
Create a beautiful alert box.
Examples
html
<div class="alert alert-info">
    <i class="fa fa-info-circle"></i>
    <span>Some information</span>
</div>
You have access to the following classes to style the alert:
.alert-info.alert-warning.alert-danger.alert-success